My latest Post.

This view,this beauty
A tear unbidden
Creeps into my eye.

My stay is short
But I shall return to this place
If only my life is long enough.

Such beauty
Gazing upon it
I hope my years are many.

Bokusui Wakayama.

Thursday, May 16, 2013

Takeda Castle.

 
   Could you imagine yourself waking-up one Summers morning, and looking through your bedroom window at this view?


   Or wondering about your property, admiring the Sakura when they are in full bloom in early Spring?
     Or taking-in the many colors that are abound during the Autumn season?      
    
   Or sitting beside a roaring fire, while your home and property are engulfed in layers of snow, during the Winter months?                                                                                                                                                                                       
    Well, that's the view Ohtagaki Mitsukage would have experienced when he, and others, resided at Takeda-jo. Located on the summit of a mountain (map location), towering over 1,000-feet, and commanding views overlooking a vast area, this castle must have been feat of engineering to construct. The castle covers an area of more than a quarter-of-a-mile in length, and 300-feet in width.
   Mitsukage, a retainer of Yamana Sozen (Lord of the area), constructed the castle in 1441. In 1577 the castle was conquered by Toyotomi Hideyoshi, who soon placed control of the castle in the hands of his younger brother, Toyotomi Hidenaga who, after less than two years residing at Takeda-jo, moved-on to take up residence at Izushi-jo and was replaced by Akamatsu Hirohide. Akamatsu, who took part in the Battle of Sekigahara, became the last Lord of the castle. He committed Seppuku after he was accused of setting fire to the Castle Town of Tottori, and Takeda-jo was abandoned. 


     After more than four-centuries of abandonment, sadly, all that remains of this once magnificent structure, are it's Ishigaki (stone walls). But, that's not to say the site is any less magnificent today, than what it was all those centuries ago.
   Some may consider a site like this boring, and not worth the time and cost to visit. But, take it from me, they couldn't be more wrong. Try to get your head around the incredible feat of engineering required in the construction of this castle. Firstly, an access route would needed to have been created  to the summit. Then, thousands of feet of soil would have had to be excavated before rocks could be laid for the foundation.
   Getting the rocks up to the summit wouldn't have been easy either, there were some huge boulders interlocked to give support to the main structure, as can be seen in these images.

  
   Now it's time to commence the construction of the many buildings that were to make-up Takeda-jo. I would hazard-a-guess some of the trees that were felled during the excavation process, would have been kept and used but, like the rocks & boulders needed for the foundation, most would have been hauled up the mountain from down below. Now, lets compare today with 1441. Today we have the luxury of modern machinery - cranes, bulldozers, trucks, to name a few. Six-hundred years ago they didn't have machines to do all the hard toil with. They had to rely on manpower. 
           
   For those working on the construction, the vistas below must have been a huge distraction. For me, as a visitor, I was overwhelmed with the surroundings as I tried to imagine what the views must have been back then.
 
   If you are planning to visit Takeda-jo, there are two ways you can see & experience these ruins: the ruins themselves, and the view from a mountain opposite, as in this image on the left (map location). Both require some walking and you have many options of what route to take. 
    If you plan to include  

the view from the opposite mountain, you will get an idea of the excavation that took place to prepare the site for construction. Also you will  encounter other sites of interest. Like this Torii, in the image on the left, and, a bit further up, this Jizo. There are also several shelters/picnic-spots along the way offering magnificent views of the castle. Take refreshments with you to enjoy once you reach your destination(s) and, most important, don't forget your camera. 

    Any time of year would be a good time to visit Takeda-jo but, in saying that, you may need to take extra precautions during winter, especially if it has been snowing.
   How to get here. Because Japan places a lot of importance on it's infrastructure, you can access Takeda from any part of Japan and by whatever means. If you are travelling by car, I suggest you program your vehicles navigation device and just drive. The Japan Rail Bantan Line passes-through Takeda, either on it's way to Himeji or Asago Cities, with connections to other major J.R. Lines. 
   Takeda Castle is referred to as Japan's Machu Picchu and, as I haven't had the honor of visiting the latter, I can quite understand how it came by that name. Like it's South- American counterpart, Takeda-jo is a very popular tourist destination - it is registered as a "National Historic Site" and has been placed on the "Top 100 Castles" list - and, during weekends and public holidays, can be very busy. So, if you are travelling here by car, I suggest you park your car in the village and take the track up to the summit. That way you will avoid the long queue to get a car park. There is also a bus service if you want to take the leisurely course. One final piece-of-advice - don't be in a hurry.


   I would like to take this opportunity to acknowledge the assistance of Eric, who administers  the 'site - Jcastles - Guide to Japanese Castles, for allowing me to access information and images on Takeda-jo. If you are planning on including a visit to any castle, while in Japan, I suggest you refer to this 'site.

Tuesday, April 2, 2013

Mikuni-goe Rindo (Mikuni Forest Road).

   Over the past year I have spent many days discovering the many aspects of the Soraku District of Kyoto Prefecture; towns, like Dosenbo, Nodono, Kasagi. Attractions, like the Fudo no Taki Waterfalls. And of course the  shrines and temples, like Kurumadani and Rokusho-jinja. Recently, as I was assessing my outings, I discovered there was a common denominator with all these trips, and, that was, at some stage of each trip I had either travelled-along or crossed-over the "Mikuni-goe Rindo" or "Mikuni Forest Road". 
Map Location.
   There is nothing special about the Mikuni-goe Rindo. As seen in the image on the left, this could be any road, passing-through any forest, in any part of Japan. But, in saying that, at certain times of the year the road can take on a very different look -  
Map Location.
as seen in this image, taken when I was on one of my "risky" rides in winter (This is that trip).
Map Location.


   But this post isn't just about the Mikuni-goe Rindo. It's what lies just off the road. Like, in the image above, this shelter/picnic spot, which is just a 5-minute walk off the road and offers an incredible 180-degree panorama as far as the eye can see. 
   My research, courtesy of the guys at Diddlefinger, informs me the road begins at the junction of Route-62 (the Kasagi-to-Ujitawara Road) and finishes, of all places, at the border of the Kyoto and Mie Prefectures.
Map Location.
   So my plan is this. Commence my adventure here (in image on the left), at the junction of route-62 and finish at a junction just outside the village of Shimagahara.
   To get to this point you can either travel via route-163. But, as the road is narrow, windy and steep, you may experience problems if you encounter another vehicle descending. The best way is via the town of Wazuka. The road isn't as difficult as if coming the other way. 
Map Location.
   About 900-meters in, and gasping for breath (the weather by now was quite hot and I had to contend with a climb), I found an opportunity to view a very popular local farming industry - tea plantations. The area surrounding Wazuka Town is famous for it's tea plantations and they can be found in some very isolated of places (as can be seen in this video). Some are so isolated that no vehicle is able to access the site. Instead the grower installs a single track carriage to get to-and-from the site.
Map Location.
   My first junction of the day - Kiriyama Road. From here you can descend, down a steep and windy road, through the settlement of Kiriyama and the Hachimangu-jinja Shrine, and emerge at Kasagi Town. The first time I traveled this road I was so impressed I returned a few years later and wrote a blog, appropriately called - Kiriyama Road. From the shrine, as you descend a path and pass-through a concrete Torii, you will be greeted with some fine views of the Kasagi area.
Map Location.
  
   A few kilometers further on, and the second junction. It is at this point the Mikuni-goe Rindo is joined by the Tokai Nature Trail. From behind where I am standing, the track descends down into the settlement of Harayama before ascending up to Juubu-san (Mt Juubu) and Kontai-ji Temple. It is at times very steep, windy and, if there has been heave rain, gutted. As seen in this video (not for the faint-hearted) I took using my Inou camera. These roads stay amalgamated until they separate at the village of Nodono (more about that later).
Map Location.

   The first village of the day. Dosenbo (video) is quite typical of the small, rural settlements of Japan, with the house frontages bordering the road and the quite & serene atmosphere that permeates through the area (although I wouldn't be saying that at midday when the residents return home for lunch). There is a small Torii in the center of town that leads, via a steep track, to a quaint wee shrine. Next door is an accommodation facility (of sorts) that offers it's guests the opportunity to test their karaoke skills. The building is easily distinguished by the Sugidama Ball hanging above the front entrance. Just outside the town is a small temple and sheltered rest spot and an ideal location to have a break. 
Map Location.

   Just up the road from Dosenbo, and another junction. What made this one grab my attention was the vending machine, and it's isolated location (click on the map link, under the image, for an idea how isolated this is). I am curious to know how well patronized this machine is. There are four roads emerge at this junction that take you through a variety of scenery. 
Map Location.
   The village of Nodono (video), and my next stop. The rural scenery in this area is so beautiful that each time I pass-through here, I discover something new. From here you can visit the Fudo-no Taki waterfalls, about 3-kilometers up the road but, set in amongst a forest, at the back of Nodono, is the Rokusho-jinja Shrine. 
The concrete Torii may be difficult to spot as it is camouflaged by tall cedar. But, if you look close enough, you will spot it. Wander through the avenue of tall cedar to the complex and take-in the serenity and calmness as you arrive at this picturesque complex. Unfortunately I can't provide any information regarding Rokusho-jinja, but I would say that it would have been frequented by the many travellers who passed-through this settlement as they migrated along the Tokaido Road.
Map Location.
   Back on the road and another junction. At this point we say farewell to the Tokai Nature Trail as it descends the steep and windy road to the town of Tsukigaseguchi, and head for our next point-of-interest..... 

.....which is just a few hundred meters down the road.
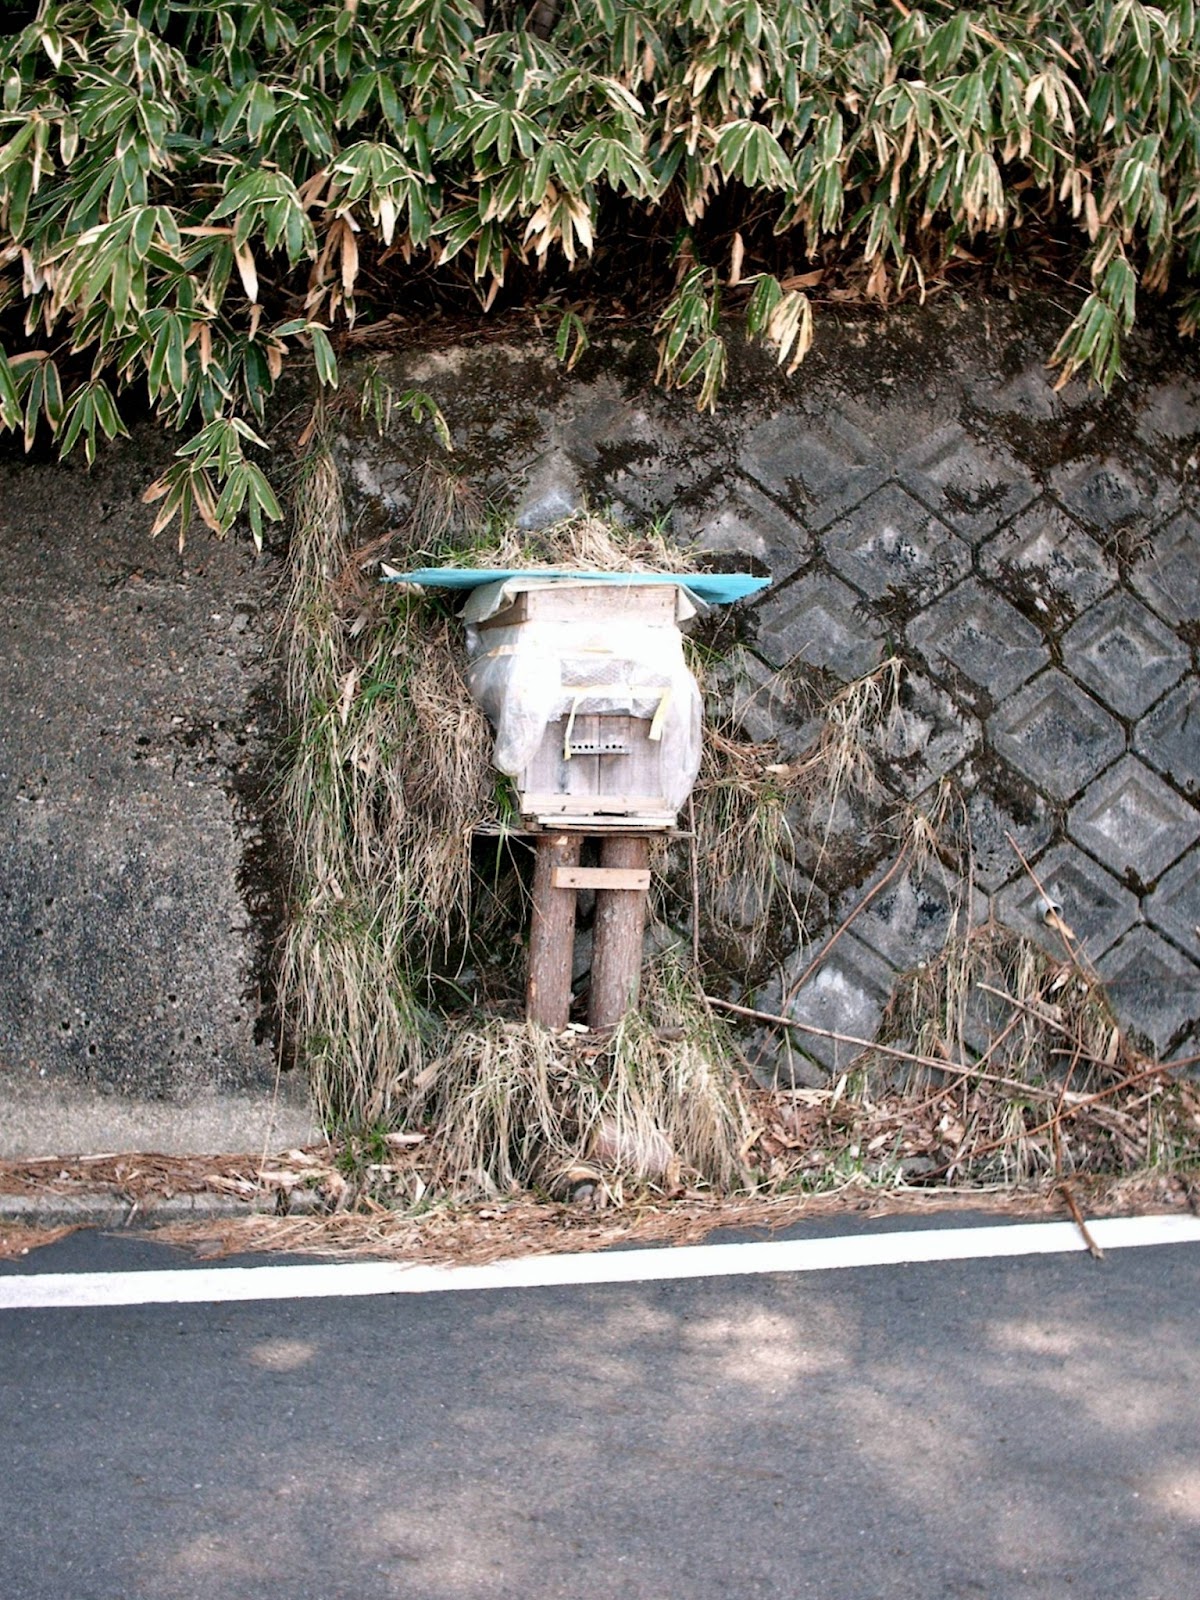
I am sorry the image isn't very clear, but see if you can guess what it is. Letterbox? No. Milkbox? No. Power/Gas Meter? No. Give up? It's a Beehive. Now I realize there is nothing spectacular about one of these, but what a location to place one; on the edge of the road. Aware of the harm an annoyed bee can do, I wasn't prepared to get any closer. 
Map Location.

   I have arrived and parked my bike in an area that has six points-of-interest, as can be seen in this video (although they are some distance apart, I have included them all on the one clip). Two items are hiking tracks that lead through the forest and descend into the village of Tsukigaseguchi. Where I am standing, where I took this photo from, is the border of Kyoto and Mie Prefectures and, according to my research, the end of the Mikuni-goe Rindo. 
Map Location.
   Where my bike is lying, in the above image, is a track that took me to two great points-of-interest. In the image on the left I am standing on a mound that is the border of three prefectures - Kyoto, Mie and Shiga. Now that has to be unique.
   Backtracking a hundred meters or so, and another track takes you to a shelter/picnic spot with breathtaking views of the Mie countryside (the image at the beginning of this post). Back on the road, and another shelter/picnic spot offering much the same views as from atop the hill.
   From here the road begins it's descent to Shimagahara and one needs to be paying attention, especially if on a bike or motorized vehicle.
Map Location.
     If you are not paying attention, or travelling too fast,  you may easily miss this little sign directing you to an interesting outcrop of rocks.
   A steep, and well marked climb, takes you to an outcrop of rocks called "Tengu-Iwa", as they resemble the legendary creature, Tengu. If you are planning on taking this side-trip, be careful when viewing the rocks and when you descend. One wrong step and god-knows where you will end-up, as seen in this video.
   During my research for this blog, I discovered this image posted on the mapping website - Panaramio. As I am a keen fan of carvings of the like as this, I was keen to check it out. But, unfortunately, thanks to the elements, or mother nature, the carving has eroded and all that is left is a hollowed-out dent. Sad.
Map Location.
   Throughout this post you may have noticed that I haven't included any images of Jizo. The answer is simple - this is the only one(s) I saw on the entire journey (the attached video of this trip shows a better view). Surprising. As I have said in other posts, you will come-across these icons almost everywhere and in some very isolated places. 


   One more bend, and, after 28-kilometers, the final junction of the Mikuni-goe Rindo. As you approach the intersection, you will see a brown signpost, as in the image on the above left, that gives you directions to the village of Shimagahara (video). Turn right here and, if you have time, and are interested in seeing more of this village, check-out the many sites and attractions on this website - Shimagahara.
   During the day, as I was exploring and recording images for this post, I discovered more points-of-interest that I intend to return and check-out. Maybe another post. Who knows. 

                                 Happy Travelling.

   Links to this post;

      Full video of the trip.

      Full map from my INOU (click on the "Graph" icon for terrain).

Friday, March 22, 2013

The Takoyaki Party.

14th November 2004.
   Takoyaki: A ball-shaped Japanese snack with copious amounts of takoyaki sauce, mayonnaise, green laver (aonori) and shavings of dried katsuobushi brushed & sprinkled over top. All washed down with copious amounts of alcohol.
  Takoyaki Party: Where a group of people - family, friends or whatever - gather at a designated place and make takoyaki, drink alcohol and have a really great time (as in above image).
   Takoyaki reminds me of the great Kiwi takeaway
of Fish-n-Chips. Whereas takoyaki is smothered with sauce & mayonnaise, we smother our fish-n-chips with lashings of tomato sauce. And, to add to the possibility of heart disease, we sometimes devour the meal in what is known as a chip-butty. 
    
   Like the Japanese equivalent, both are best washed-down with a good cold beer, or two. Whether these meals could be regarded as a delicacy, I will leave that up to you to decide. For me. There is only one word to describe a feed of this caliber - oishii.


   Originating in Osaka back in 1935, takoyaki soon became popular in the Kansai Region and later spread (no pun intended) to the Kanto Region and other areas of Japan. Facilities selling takoyaki can be found everywhere and they come in many shapes-and-sizes - specialist restaurants, small street vendors, private homes ( where the garage has been converted), and, like in the image above, at fairs and other public events. 
Video.

   So, where did my love of this delicacy originate from? To answer that I need to go back to the second week of November, 2004. I was standing outside this shop (in the image on the left), at the Keihan Hirakata Station, when I became intrigued by the actions of the staff behind the counter. The man, with a spike in his hand, was busy turning little balls (about the size of a table-tennis ball), on a hotplate, at an incredible pace. Then, when they were cooked, he would flick them into a tray and pass the tray onto the next assistant who would then take a paint-brush and spread brown sauce over them and sprinkle some ingredient over that. Later that evening, during dinner with my family, I recalled to them what I saw earlier and, all in unison, said "aah Takoyaki". Somewhere in their explanation the term "Takoyaki Party" was mentioned and, on the 14th November 2004, I was to experience my first takoyaki party. God-knows how many we devoured, or how much alcohol we consumed, but this was to become the best social occasion in my life. But it didn't finish there. After our mess was cleaned-up, we all hopped-into a car and headed-off to the nearest karaoke parlour  for 4-hours of singing & drinking and fun. I must have been so drunk because the first song I sung was Queens Bohemian Rhapsody.

   Now lets come forward to Sunday 17th March 2013, and the opportunity for my wife and I to host a takoyaki party for our family. But, before I show you the video of the occasion, I shall explain what equipment and ingredients are required.
First up is the special takoyaki pan. These come in many shapes and sizes, depending on how many will be attending your party. This particular pan (in the image on the left) is a combination pan that can be used to cook Okonomiyaki, Teppanyaki and many other recipes.
   For the ingredients you commence with finely-chopped cabbage (much finer than for a coleslaw). For today's party we used half a cabbage which took me the best part of 30-minutes to chop.
  Next Tako, or Octopus, which is diced into small pieces so as not to take up too much space in the dumpling.
   On the tray, in the image on the right, is finely diced Red Ginger, sliced Spring Onion and Tenkasu ( I remember at my first party asking why we were adding Rice Bubbles to the mixture.)


   The three ingredients, in the above image, when mixed, become the all important Batter, in the image on the right. Unlike most batters, that are fairly condensed, this is very thin, like soup. And, as you will witness in the video, it is poured abundantly over the pan. 
And then, to top-it-all-off (no pun intended), the toppings. Firstly a healthy squirting of Mayonnaise, followed by an equally large dose of special Takoyaki Sauce, followed by a generous sprinkling of Katsuobushi ( not to be confused with wood-shavings) and Aonori. 


   Oops. I almost forgot to mention the tools needed. Apart from the knife, to prepare & chop some of the ingredients, and a whisk, to make the batter, you will need a metal spike, to turn and serve the dumplings, but we use long wooden toothpicks instead. Also a special brush to oil the pan before each serving.
   Now this is what your table should look like, as you begin your takoyaki party. All that is missing is the liquid refreshments. But, don't despair, they are only a meter-or-so-away.
   So now sit back and watch this video of the "Barcock Takoyaki Party".


                                                          Bon Appetit.